During my 5-day workshop with artist Alban Dreyssé at his studio Imago in Strasbourg, I had the chance to try a printmaking technique that had long fascinated me: mezzotint, also known as manière noire.
This method intrigued me from the start, and I was excited (and a bit intimidated) to finally try it. In this article, I share the steps involved in creating a mezzotint print — a process that’s both demanding and deeply rewarding.
Preparing the Plate: Rocking with the Mezzotint Tool
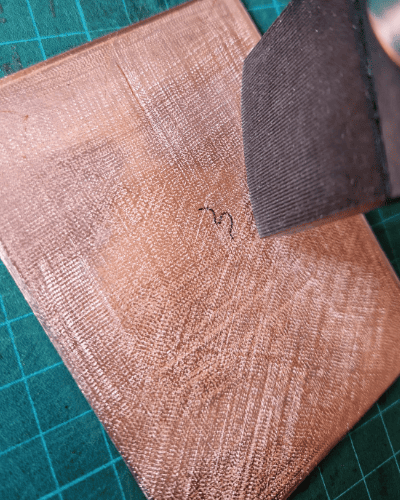
The first step? Patience and persistence! I worked on a copper plate, and began by using a special tool called a rocker to create thousands of tiny pits across the surface. This texturing — called rocking or grainage — roughens the metal so that it will hold ink evenly across the entire plate, resulting in a deep, velvety black when printed.
To get a fine, even grain, the tool is rocked in multiple directions, overlapping layers until the surface is uniformly textured.
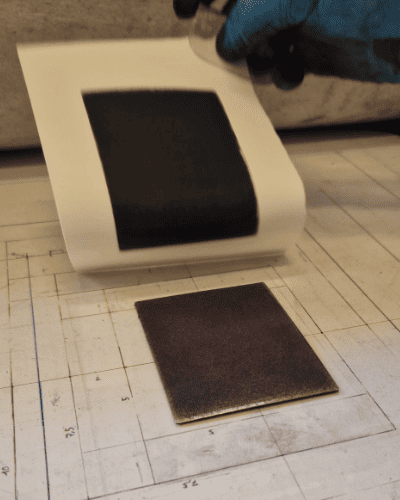
Once the plate is fully rocked, we make a first test print. The result is pitch black — a good sign! It means the plate is ready for the next stage.
Drawing with Light: Polishing with Agate
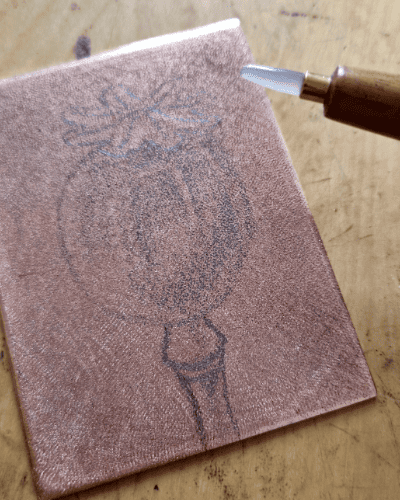
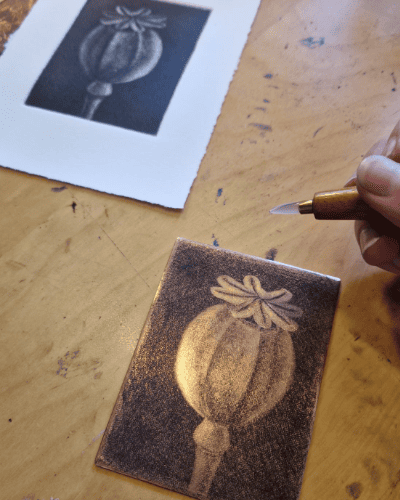
Now comes the magical part: drawing by removing.
Using a smooth agate burnisher, I slowly polish the surface of the plate to bring out the highlights of my image. The more I polish an area, the smoother it becomes — and the less ink it holds — so the print will appear lighter in that spot.
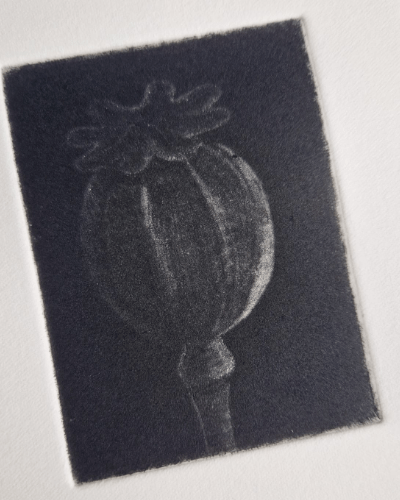
For this first mezzotint, I chose a simple yet striking subject: a dried poppy seed pod. Its rounded form and textured surface made it a perfect match for a technique that plays with subtle contrasts between light and shadow.
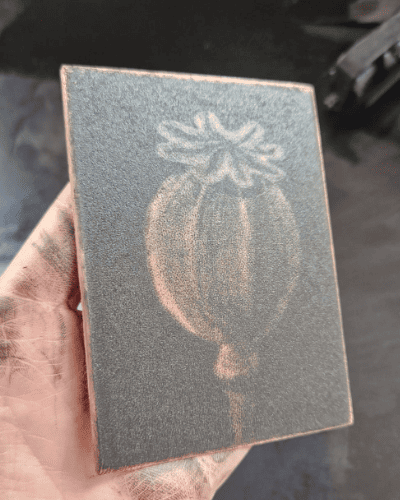
To follow my progress, I create intermediate prints — a first test, then back to polishing, then another test… It’s a slow and meditative process, like gently coaxing the image out of the darkness.
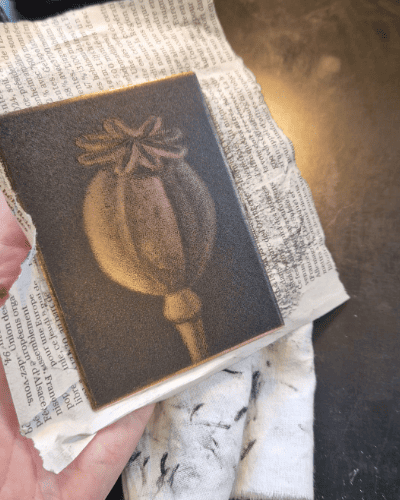
Ink is applied generously over the entire plate, then gradually removed:
first with tarlatan cloths (a stiff, textured fabric),
then with newspaper to fine-tune the wiping.
This step is delicate: you want to leave just enough ink in the right places — not too much, not too little — to let the image come alive.
The Final Print: Revealing the Image
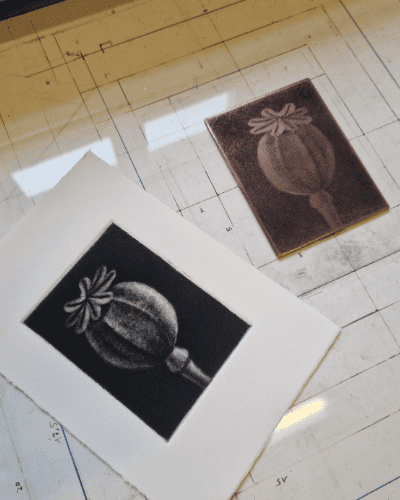
After several rounds of polishing and testing, I’m finally ready for the final print.
I dampen my paper, position it over the plate, and run everything through the intaglio press — a bit of physical effort, and a lot of anticipation. The result appears as I lift the paper: the image slowly revealed from the inky blackness.
My Impressions
This experience with mezzotint left a deep impression on me (pun intended!). It’s a technique that feels almost opposite to traditional drawing: rather than adding lines or shading, you start from pure black and remove material to bring in the light.
It reminds me a lot of working with charcoal, where you draw highlights by erasing — sculpting the form out of the dark background rather than building it up from white. It’s tactile, slow, and incredibly satisfying.
Mezzotint is especially suited to subjects with lots of deep shadows and dramatic contrast — nighttime scenes, strong portraits, or still lifes like my poppy seed pod, with its natural texture and round forms.
It has become one of my favorite printmaking techniques, probably because it still feels so connected to drawing, but with a completely different, more physical and silent approach.
Nous utilisons des cookies pour vous garantir la meilleure expérience sur notre site web. Si vous continuez à utiliser ce site, nous supposerons que vous en êtes satisfait.
Vous pouvez révoquer votre consentement à tout moment en utilisant le bouton « Révoquer le consentement ».